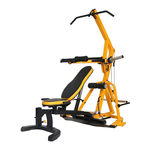
PowerTec LeverGym Assembly Walkthrough

LeverGym and to ensure you have all parts. Do Not tighten any bolts unless told to do so.
Related Manuals for PowerTec LeverGym
Summary of Contents for PowerTec LeverGym
- Page 1 Powertec LeverGym Walkthrough: Step 1: Unpack all items so you can see each part, this will help with the construction of the LeverGym and to ensure you have all parts. Do Not tighten any bolts unless told to do so.
- Page 2 Step 2: Using bolts #36 #37 & parts #1 #3 #19 build the base of the gym. Note: Do Not tighten these bolts. Step 3: Attach the leg support tube and foam rollers to the main frame using bolt #34.
- Page 3 Step 4: Fit the upper upright tube (#6) to the bottom main frame. You will need to feed the cable down to the bottom of the main frame and insert a pulley provided as shown in the image above.
- Page 4 Step 5: Attach parts #4 to the frame by using bolts #38 & #32. Note: You can now tighten the bolts that you have put in. Step 6: Attach weight horns to the weight rotating tube using bolts #28.
- Page 5 Step 7: Attach the weight rotating tube and feed your cable through all the pulleys as shown above.
- Page 6 Step 8: Like before attach weight horns to the lever arms.
- Page 7 Step 9: Slide the axle through the upright and tighten in place with bolt #31. Put the lever arms on next and tighten with bolts #29 & washer #40. Place both safety squat bar and press arm bar to hold the lever arms in place.
- Page 8 Step 10: Tighten all bolts and go over the machine to check you are not missing any bolts or that any are lose. Attach your small attachment and your good to go.
- Page 9 There you have it the Powertec LeverGym.

